Glowing From Within
Full Glam for Sensitive, Acne-Prone Skin: A Non-Comedogenic Routine That Lasts All Day
If you’ve ever struggled with sensitive, acne-prone skin, you already know how tricky it can be to pull off a full glam look without worrying about clogged pores or irritation. For me, the secret has been finding the right non-comedogenic products and layering them properly so my makeup looks flawless, feels comfortable, and most importantly—doesn’t set my skin back. Here’s my step-by-step routine for a glam finish that’s glowy, long-wearing, and completely acne-safe.
Gabriela Ocampo
8/28/20253 min read
Skincare Prep (The Foundation of Every Look)
Before I even think about foundation or concealer, I always prep my skin properly. A smooth canvas makes all the difference.
Step 1: Cleanse
For those full glam days, I start the day with a gentle cleanse to remove excess oils and refresh my skin. I like to use La Roche-Posay Toleriane Purifying Foaming Facial Cleanser.
Step 2: Serum
Next, I apply the Equalberry Brightening Serum, which helps fade post-acne marks while giving my skin a natural radiance that shines through my makeup.
(Tip: wait 60 seconds to let your serum absorb before moving on.)
Step 3: Moisturizer
I follow with the La Roche-Posay Toleriane Double Repair Moisturizer. It hydrates my skin without feeling heavy or greasy—perfect for oily/combination skin like mine.
(Let it sit for 1–2 minutes so it doesn’t interfere with primer.)
Step 4: Primer
Once my moisturizer is fully absorbed, I apply the Smashbox Photo Finish Primer. It smooths out texture, helps foundation grip, and keeps me from looking shiny later in the day (a lifesaver for us oily-prone girls!).
The Glam Makeup Routine
Step 5: Concealer First (My Spot-Correcting Trick)
Instead of starting with foundation, I go in first with the Too Faced Born This Way Concealer. I use it as a blemish corrector, targeting only the spots that need extra coverage such as dark under eyes or post-blemish marks. I always let it sit for 1–2 minutes before blending—this little trick gives you more coverage without piling on more product.
Step 6: Eyeshadow
While the concealer sets, I move on to eyeshadow. The Urban Decay Naked Palette is my go-to because the neutral tones work for any occasion. For a soft smoky glam, I blend two shades of brown: a deeper shade in the crease and inner corner, and a lighter brown toward the outer eye for dimension.
Step 7: Lashes (My Signature Combo)
For lashes, I layer two mascaras that I swear by:
Maybelline Lash Sensational Sky High Mascara
L’Oréal Voluminous Lash Paradise Mascara
Together, they give my lashes insane volume, lift, and length—without clumping or flaking.
Step 8: Foundation
Once my eyes are done, I move on to foundation. I use the Laura Mercier Flawless Lumière Foundation, which has a natural, radiant finish that makes my skin glow without looking oily. I dot it all over my face with my fingers, then use a foundation brush from the DUcare Professional Makeup Brushes Set (Amazon find!) to blend everything together, including the concealer I applied earlier.
Step 9: Blush for a Natural Flush
Next comes blush, and my holy grail is the SAIE Dew Blush Liquid Cream Blush. It blends seamlessly into the skin and gives a healthy, natural-looking glow.
Here’s how I apply it:
Dot a small amount high on my cheekbones, above the apples of my cheeks.
Add a light dot across the bridge of my nose for a sun-kissed touch.
Blend upward into my temples with a blush brush from the Real Techniques Everyday Essentials Set.
Tip: Blending upward not only softens the look but also lifts the face for that sculpted effect.
Step 10: Powder to Lock It In
To keep everything in place, I set my T-zone and concealed areas with the Maybelline Fit Me Matte + Poreless Pressed Powder (Translucent, Shade 1). It controls shine without making my skin look flat or cakey.
Step 11: Eyeliner for Definition
To enhance my eyes even more, I line my lower waterline with black eyeliner (a trick I’ve carried over from my everyday look). For glam nights, I also add a subtle wing on the outer corners—it sharpens my eye shape and instantly makes the look more dramatic.
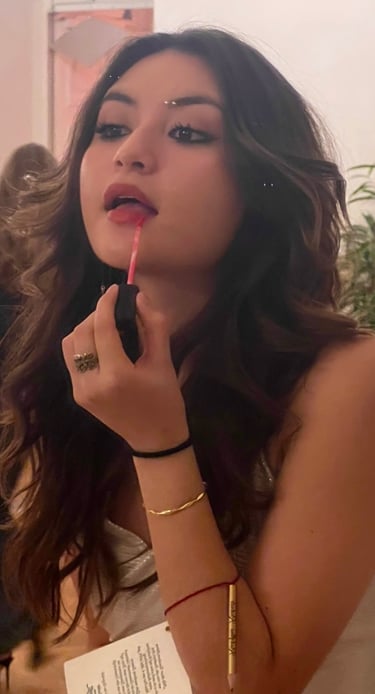
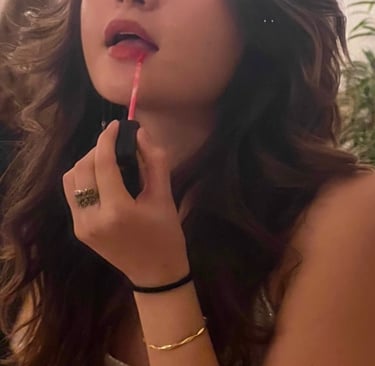
Step 12: Lips – Shape & Shine
For lips, I like to keep things bold yet soft:
I outline my natural shape with the NYX Slim Lip Pencil in Nude Pink.
To slightly overline and add fullness, I use the shade Ever from the same line.
For shine, I finish with the NYX Fat Oil Lip Drip Gloss in Chillin Like a Villain (Pale Dusty Rose). It’s moisturizing, glossy, and ties the whole glam look together without being sticky.
Step 13: Setting Spray
Finally, I lock everything in with the Charlotte Tilbury Airbrush Flawless Setting Spray. It’s hydrating, waterproof, and guarantees my glam lasts all night.
Final Thoughts
This routine gives me full glam confidence while still keeping my skin healthy and happy. Every product I use is non-comedogenic, sensitive-skin friendly, and acne-safe—so I can look glam without stressing about breakouts later.
✨ Radiant skin, bold eyes, and glossy lips—all while protecting my skin. That’s the kind of glam I’ll always say yes to !
Skin and Bloom
Your go-to blog for skincare tips
© 2025. All rights reserved.